Making a sourdough starter from scratch can feel a little intimidating at first. There’s a lot of talk about feeding schedules, bubbles, discard, and “doing it wrong,” which can make it seem more complicated than it actually is. The truth is, a sourdough starter is just flour and water working together to capture natural yeast from your environment – and it’s far more forgiving than most people think.
This simple, no-fuss method breaks everything down into easy, manageable steps so you don’t need any baking experience or special equipment to get started. No complicated ratios, no stress, just a straightforward process you can follow at home with basic pantry ingredients.
In just 5–7 days, you’ll have an active, bubbly sourdough starter that’s ready to use for baking everything from artisan sourdough bread to pancakes, pizza dough, and more.
What Is a Sourdough Starter?
A sourdough starter is the heart of all sourdough baking.
It’s a simple mixture of flour and water that, over time, becomes alive with natural wild yeast and beneficial bacteria. This living culture is what replaces commercial yeast in traditional bread making.
Instead of relying on packets of dried yeast from the store, you’re essentially growing your own natural leavening agent right in your kitchen. As the starter ferments, it begins to bubble, rise, and develop a slightly tangy smell — all signs that it’s becoming active and ready to use.
Think of it as your “base ingredient” for everything sourdough.
Once it’s healthy and active, it has the power to:
- Naturally rise bread dough
- Create that classic sourdough flavour
- Improve texture and chewiness in baked goods
- Work as a long-term baking companion you can keep feeding and reusing
It might look like just a jar of flour and water, but inside it’s a living ecosystem that transforms simple ingredients into artisan-style bread.
The best part? You don’t need anything fancy to start. Just patience, consistency, and a bit of care while it develops over the first week.
Why You Need a Sourdough Starter (and what it actually does)
A sourdough starter might sound like something complicated or overly “artisan,” but at its core, it’s simply what makes real sourdough bread possible.
Instead of using store-bought yeast, a sourdough starter is a living mixture of wild yeast and beneficial bacteria that you grow right in your kitchen using just flour and water. Over time, this mixture becomes active, bubbly, and powerful enough to naturally raise bread dough.
But the real magic isn’t just in the rise – it’s in the flavour.
Because the fermentation happens slowly and naturally, sourdough bread develops a deeper, slightly tangy taste that you just can’t get from commercial yeast. The longer fermentation also helps create a better texture: chewy on the inside, crisp on the outside, and full of those beautiful air pockets everyone loves.
There’s also a practical side to it.
Once you have an active starter, you can bake again and again without needing to buy yeast. You simply feed and maintain your starter, and it becomes a long-term kitchen staple that can live for years.
In other words, this one simple jar of flour and water is what unlocks:
- Homemade artisan sourdough bread
- Soft and fluffy pancakes
- Crispy pizza bases
- Rustic focaccia
If you’re ready to take the next step, your starter is the foundation for all of it.
👉 Next up: Once your starter is active, try it in our Easy Homemade Sourdough Bread recipe to turn it into your first loaf.
Ingredients
The beauty of sourdough starter is how incredibly simple it is. You don’t need any special equipment, commercial yeast, or complicated ingredients — just two basics you already have in your kitchen.
You only need:
- 1 cup plain flour or bread/wholewheat flour
(Bread flour tends to ferment a little more actively, but plain flour works perfectly fine.) - ½ cup water
(Filtered water is ideal if your tap water is heavily chlorinated, as chlorine can slow fermentation.)
That’s it.
No yeast packets. No sugar. No extra steps.
Just flour, water, and time doing the work for you.
The consistency you’re aiming for is a thick, smooth paste – similar to pancake batter. It should be stirrable but not runny. This consistency helps the natural fermentation process begin properly and gives the wild yeast a stable environment to grow.
Once mixed, this simple base will slowly transform over the next several days into a bubbly, active starter that’s ready for baking.
Day by Day Guide
his is where your sourdough starter really comes to life. Over the next 5–7 days, you’re simply feeding and observing a natural fermentation process. Nothing complicated — just consistency and a bit of patience.
Each day you’ll notice small changes: bubbles forming, smell developing, and the mixture slowly rising into an active starter.
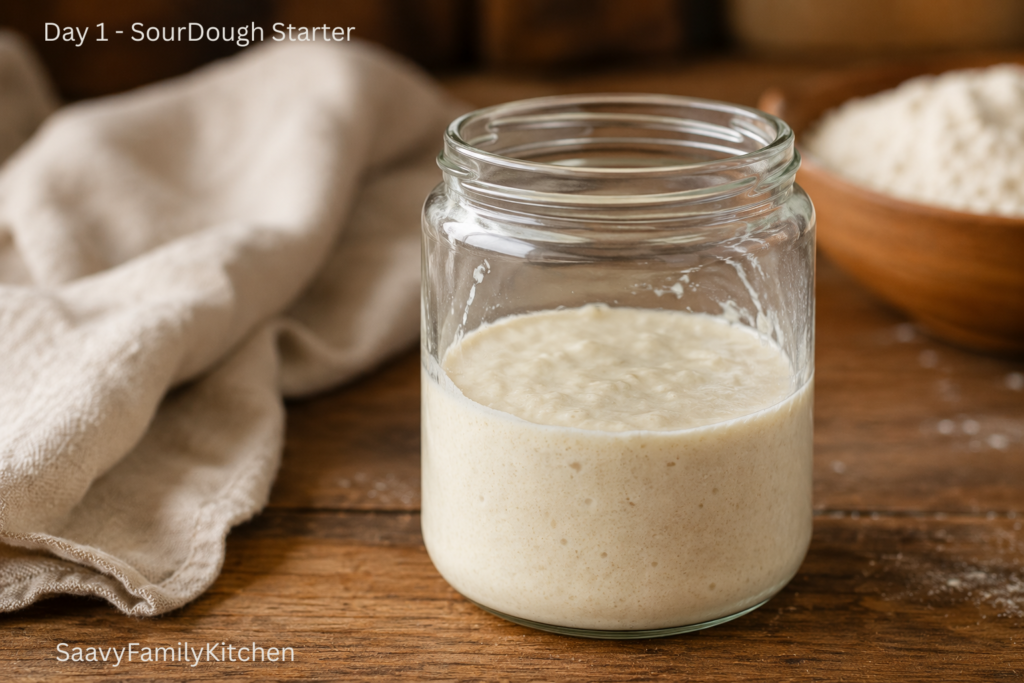
Day 1 – Mixing the Starter
On day one, combine your flour and water in a clean jar and stir until no dry flour remains.
You’re looking for a thick, smooth paste — not runny, not stiff.
At this stage, nothing will look exciting yet. That’s completely normal.
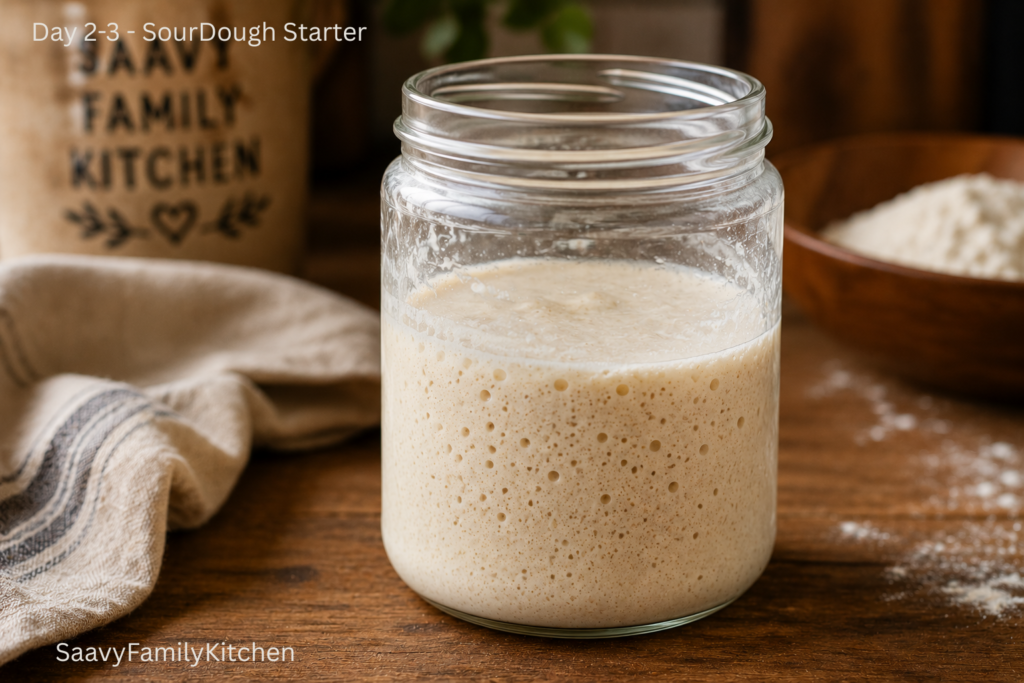
Day 2–3 – First Signs of Activity
You may start to see the first tiny bubbles forming on the surface or around the sides of the jar.
The smell might also begin to change slightly — a bit sweet, a bit tangy, or even “yeasty.”
Don’t worry if you don’t see much yet. Some starters are slower than others depending on temperature and flour type.
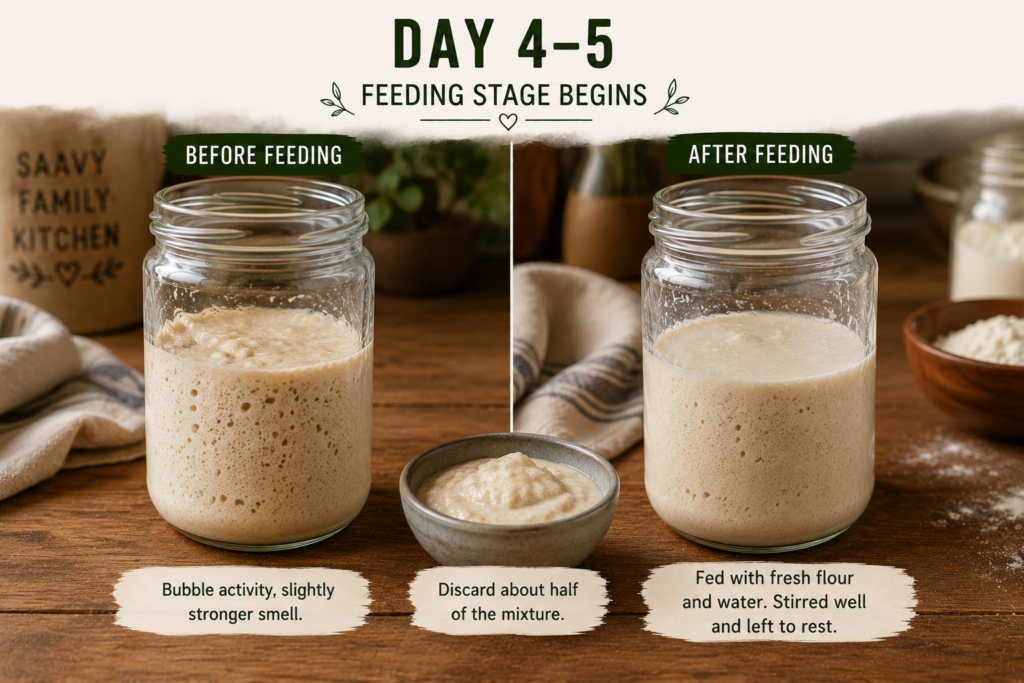
Day 4–5 – Feeding Stage Begins
Now it’s time to start feeding your starter.
Each day:
- Discard about half of the mixture
- Add fresh flour and water (same amounts as Day 1)
- Stir well and leave it to rest
This feeding process strengthens the natural yeast and bacteria, helping your starter become more active and stable.
By now, the smell will be stronger — slightly sour or tangy — which is a good sign.
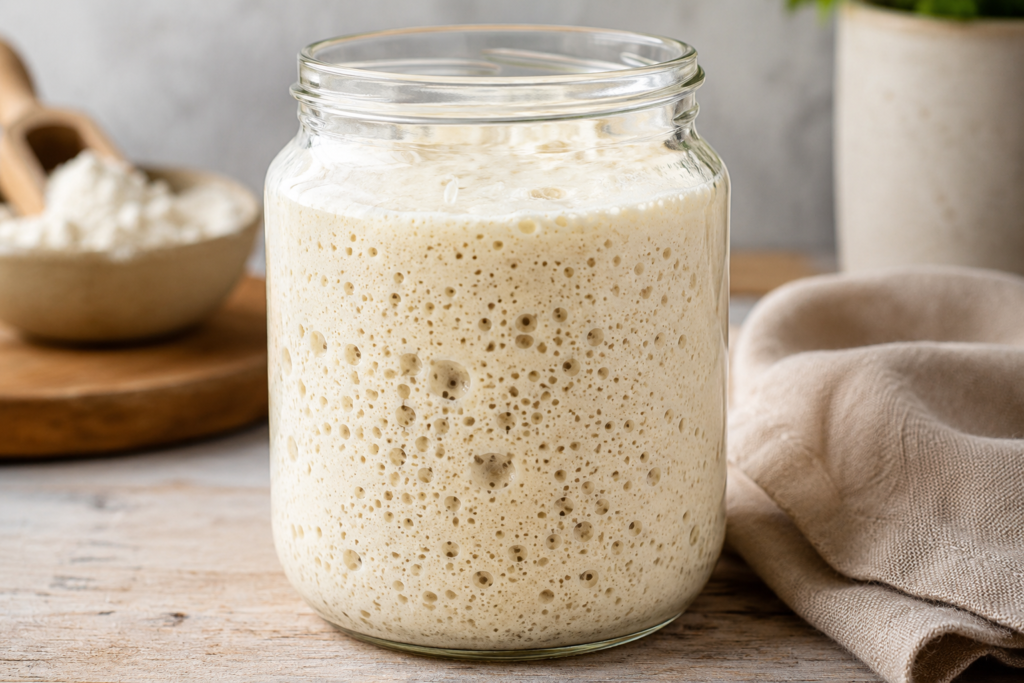
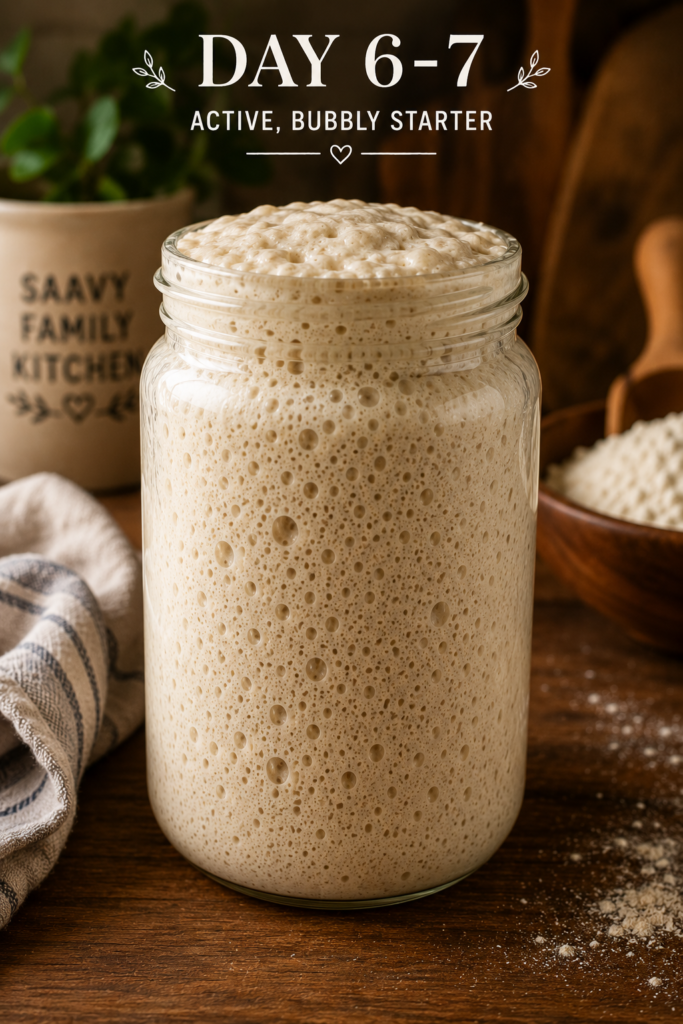
Day 6–7 – Active Starter Stage
This is where things get exciting.
Your starter should now:
- Show lots of visible bubbles
- Rise and fall in the jar
- Smell pleasantly sour and fermented
- Potentially double in size within a few hours of feeding
If it’s doing these things, it’s very close (or already ready) to use for baking.
How To Know It’s Ready
After several days of feeding and watching your starter grow, there comes a point where it becomes strong enough to actually bake with. This is the moment you’ve been working towards.
A ready sourdough starter will show clear, consistent signs of activity – not just occasional bubbles, but reliable growth and fermentation after feeding.
✔️ Signs your sourdough starter is ready
Look for these key indicators:
- It doubles in size within 4–6 hours of feeding
- It is full of visible bubbles throughout the mixture
- It has a pleasant tangy, slightly yeasty smell (not rotten or harsh)
- It looks light, airy, and active instead of dense or flat
- It shows a clear pattern of rising and falling in the jar
If your starter is doing most (or all) of these, it’s likely ready to bake with.
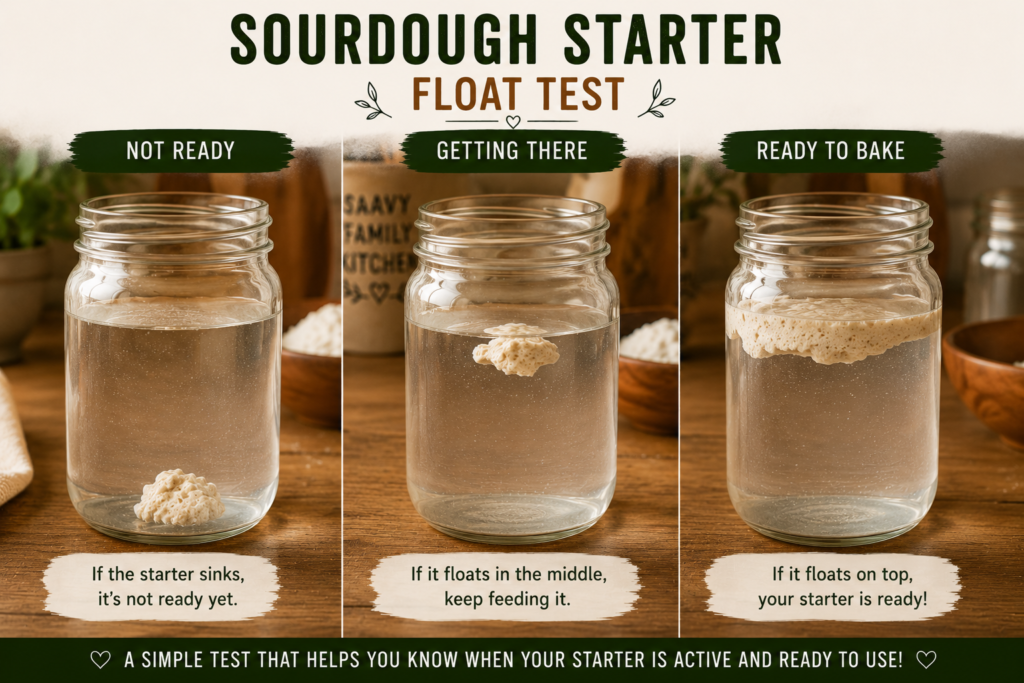
💧 The Float Test (Simple Check)
One of the easiest ways to double-check readiness is the float test.
Take a small spoonful of starter and gently drop it into a glass of water.
- If it floats, it’s full of gas and ready to use for baking
- If it sinks, it may need a few more feeds to strengthen
This isn’t a perfect test every single time, but it’s a helpful beginner-friendly guide.
Common Mistakes when Making Sour Dough Starter
Sourdough starter is simple, but a few small mistakes can slow things down or make it feel like it’s not working. Most issues come down to timing, temperature, or consistency rather than something going wrong.
❌ Using water that is too cold or heavily chlorinated
Cold water can slow fermentation, and chlorine in tap water can weaken the natural yeast.
Fix: Use room temperature water. If your tap water is heavily chlorinated, let it sit out for a few hours or use filtered water.
❌ Not feeding your starter regularly
Once your starter becomes active, it needs consistent feeding to stay strong. Skipping feeds can make it sluggish.
Fix: Stick to a simple daily feeding routine during the active stage.
❌ Discarding too much or too little
Many beginners worry about wasting starter or don’t remove enough before feeding, which throws off the balance.
Fix: Discard about half before each feed. It doesn’t need to be exact.
❌ Expecting it to be ready too quickly
This is the most common mistake. A starter is alive and affected by temperature and environment, so timelines vary.
Fix: Be patient and focus on signs of activity (bubbles, rise, smell) rather than exact days.
Sour Dough Starter Troubleshooting Table
| Problem | Cause | Fix |
|---|---|---|
| No bubbles | Starter is too cold or too young | Move it to a warmer spot and continue feeding daily |
| Not rising | Starter is weak or underfed | Continue feeding consistently for a few more days using the same routine |
| Bad smell | Early fermentation stage (this is normal) | Keep feeding – the smell will improve as the starter develops |
| Mold on top | Contamination or unclean environment | Discard and restart using a clean jar and fresh ingredients |
| Separation (liquid layer on top) | Starter is hungry | Stir it in and increase feeding consistency |
| Slow activity | Cool temperature or irregular feeding | Keep starter in a warm, stable spot and stick to a regular feeding schedule |
Most sourdough starter issues are solved with consistency. Once established, a starter becomes very stable and easy to maintain.
How to Use Your Sour Dough Starter (The Best Part!)
Once your sourdough starter is active and bubbly, this is where it really pays off. You’re not just maintaining a jar anymore — you’ve created a natural leavening base that can be used across a range of homemade recipes.
A strong starter is incredibly versatile and can be used in both sweet and savoury baking. The flavour it adds is what makes sourdough-style cooking so special – slightly tangy, deeply flavoured, and more complex than standard yeast-based recipes.
Here are some of the best ways to use your sourdough starter:
- Sourdough Bread – This is the classic and most popular use. Your starter replaces commercial yeast and gives you a crusty, artisan-style loaf with a soft, airy inside.
- Pancakes or Waffles – Starter can be used to create light, fluffy pancakes with a slight tang and extra depth of flavour. Perfect for weekend breakfasts.
- Pizza Dough – Using sourdough starter in pizza dough creates a chewy, flavour-packed base with a crisp crust.
- Foccacia – One of the easiest sourdough-style bakes. The starter gives it a light, airy texture with beautiful bubbles and structure.
Once your starter is established, you can keep it in the fridge and feed it weekly, meaning you’ll always have it ready for baking whenever you want.
Think of it as a long-term kitchen tool – once you’ve built it, it keeps working for you.
FAQ (FREQUENTLY ASKED QUESTIONS)
This section answers the most common questions about sourdough starter so you know exactly what to expect during the process.
How long does it take to make a sourdough starter?
It usually takes 5–7 days, but depending on temperature and flour type, it can sometimes take up to 10 days. The key is not the exact timeline, but when it becomes active, bubbly, and doubles in size after feeding.
Why does my starter smell funny?
A sourdough starter goes through different smells as it ferments. Early on, it may smell sweet, sour, or slightly unpleasant. This is completely normal and part of the natural fermentation process. As it matures, the smell becomes more pleasantly tangy and yeasty.
Can I use plain flour instead of bread flour?
Yes. Plain (all-purpose) flour works perfectly fine for sourdough starter. Bread flour may become active slightly faster due to higher protein content, but both will work.
Can I refrigerate my sourdough starter?
Yes. Once your starter is established and active, you can store it in the fridge. This slows fermentation, meaning you only need to feed it about once a week.
What if my starter isn’t bubbling?
If you don’t see bubbles yet, don’t worry. It may simply need more time, a warmer environment, or more consistent feeding. Many starters take several days before showing strong activity.
Can I use it as soon as it doubles once?
Not always. It’s best to use your starter when it is consistently doubling after feeding and shows strong, stable activity over multiple feed cycles.
Storage & Maintenance
Once your sourdough starter is active, the goal shifts from “building it” to simply keeping it healthy and ready to use whenever you need it. The good news is that maintenance is very simple and doesn’t take much time at all.
Storing your sourdough starter
If you bake often (every few days), you can keep your starter at room temperature and feed it daily.
If you bake less frequently, the best option is to store it in the fridge. This slows down fermentation and makes it much easier to maintain.
To store in the fridge:
- Feed your starter as normal
- Let it sit for about 1–2 hours at room temperature
- Place it in the fridge with a loose lid or breathable cover
How often to feed it
Room temperature starter:
Feed once every 24 hours to keep it active and strong.
Refrigerated starter:
Feed once a week to keep it healthy.
When you’re ready to bake, simply take it out of the fridge and give it 1–2 regular feeds to bring it back to full activity.
What to do with discard
Every time you feed your starter, you’ll remove some of it (called “discard”). Instead of wasting it, you can use it in other recipes or store it for later.
Sourdough discard can be used for:
- Pancakes
- Waffles
- Crackers
- Flatbreads
- Muffins and quick bakes
Keeping it healthy long-term
A healthy starter is:
- Bubbly after feeding
- Slightly tangy in smell
- Stored in a clean jar
- Fed consistently
As long as you keep up with regular feeding, your starter can last for years – even decades – and become a permanent part of your kitchen routine.
Now that your sourdough starter is active and ready to use, it’s time to turn it into real baking results. This is where you move from learning into actually making bread and other recipes.
Looking for what to make with your sourdough starter? Try these next:
👉 Easy Homemade Sourdough Bread
Your first and most important bake using an active starter. A simple beginner-friendly loaf with a crisp crust and soft, airy inside.
👉 Artisan Bread Collection
Explore more rustic, bakery-style bread recipes you can make at home once you’re confident with your starter.
👉 Easy Family Dinners (Bread Pairing Ideas)
Use your homemade sourdough as the perfect side for soups, stews, and simple family meals.
Your sourdough starter is the foundation — but these recipes are where it truly comes to life in your kitchen.